This is the first session. At the end of it you will have one set with two pads that play, which is all you need to understand how the rest of the app works.
Do it sitting down, with headphones, somewhere that is not a stage. Ten minutes is about right.
Before you start
Get two audio files onto the phone. A backing track and a sound effect make the best pair, because they behave differently and you will see the difference immediately.
Anything a phone can normally play will do: .mp3, .m4a, .wav, .aiff, .flac,
.ogg. Nothing streams, ever, so the files have to be somewhere the Android file
picker can get at them.
Step 1. A set to put your songs in
A set is one grid of pads. Usually it is one show, or one part of one.
Open the app. There is already a set called “My First Set” waiting for you, and you can use that one. To make your own instead, tap ”+ New Set” on the home screen.
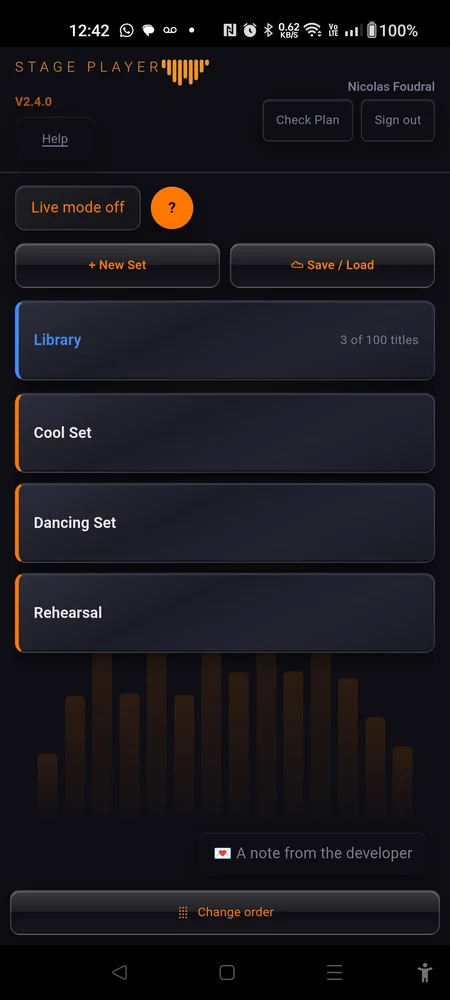
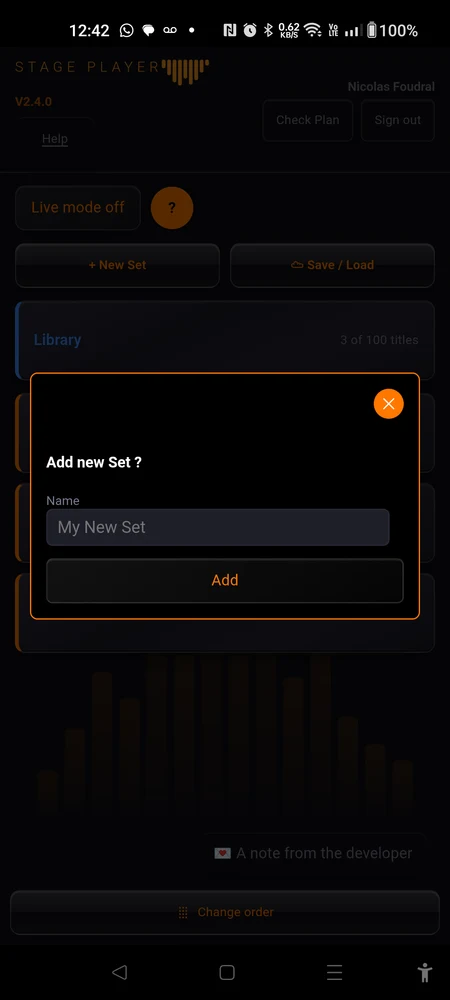
A dialog opens, titled “Add new Set ?”, with a “Name” field. Type something you will recognise in the dark (“Saturday, first half” beats “Set 3”), then tap “Add”. Leave the field blank and the set is called “My New Set”.
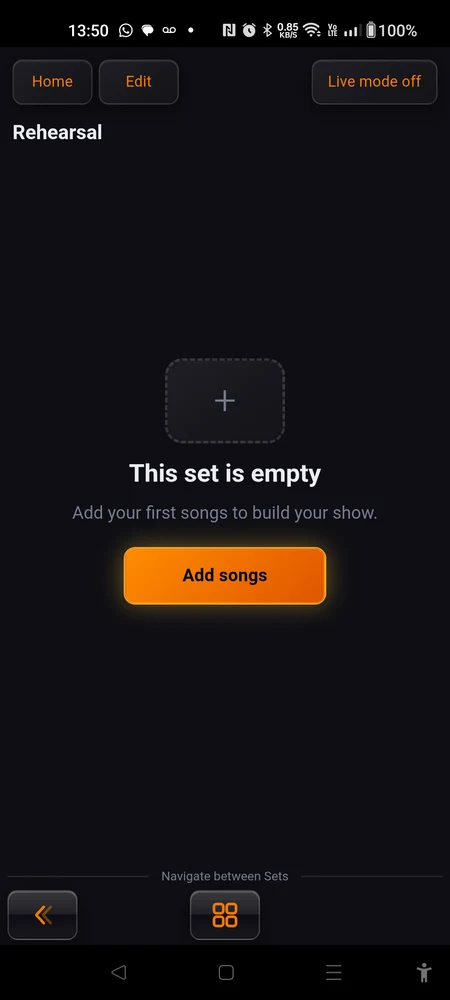
Tap the set to go into it. New sets arrive with twelve empty slots, but until there is something in one of them you get a card that says “This set is empty” instead of a wall of blank pads.
Step 2. Get into edit mode
Look at the header. “Home” takes you back out, and “Edit mode off” is the switch between preparing and playing.
Tap “Add songs” on the empty card, or “Edit mode off” in the header. Either one puts you in edit mode, and the button turns red and reads “Edit mode on”, the way “Live mode on” does beside it.
Everything about a pad is reached from edit mode, and only from edit mode. Tapping a pad in play mode plays it, and holding a pad down does exactly the same thing as tapping it. If you are hunting for a setting and cannot find it, you are in play mode.
Step 3. Decide how many pads you want
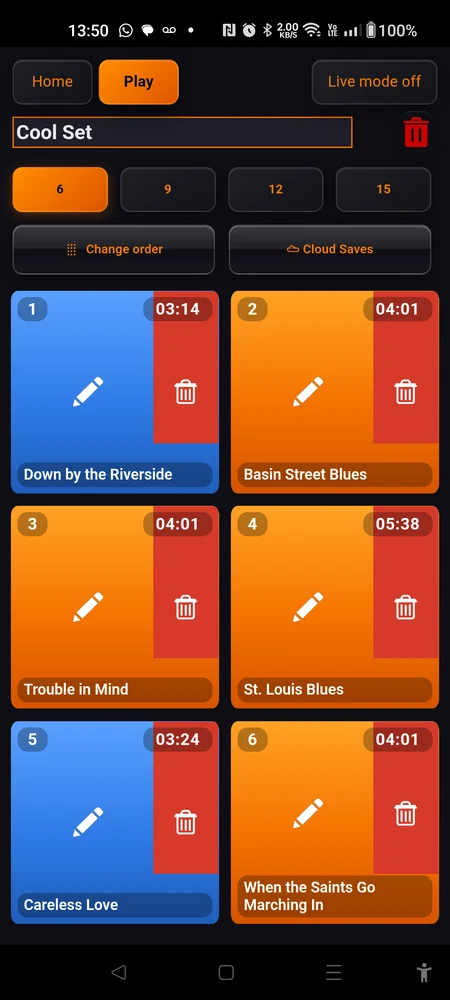
In edit mode a row of four numbers appears: 6, 9, 12, 15. That is how many slots the grid shows, and it changes how big each pad is.
Six enormous pads are easy to hit under stage lights. Fifteen small ones fit a long set on one screen. Start at 12 and change your mind later, because nothing is destroyed either way: shrinking the grid only hides the slots past the number you picked, and growing it again brings them back exactly as they were.
Step 4. Put your backing track on the first pad
Tap the first pad. Its settings open.
- Tap “Choose File” and pick your backing track. The app copies the file onto the phone, so this can take a moment on a long recording.
- The pad takes the file’s name. If your file is called
dont_stop_me_now_BT_final_v3.mp3, that is what the pad is called, which is why the next step exists. - If you see “Audio converted to 16-bit WAV for playback”, nothing is wrong. A 24-bit or 32-bit WAV, or an AIFF, cannot be played directly by the phone’s audio engine, so the app rewrites it once, on import. It sounds the same.
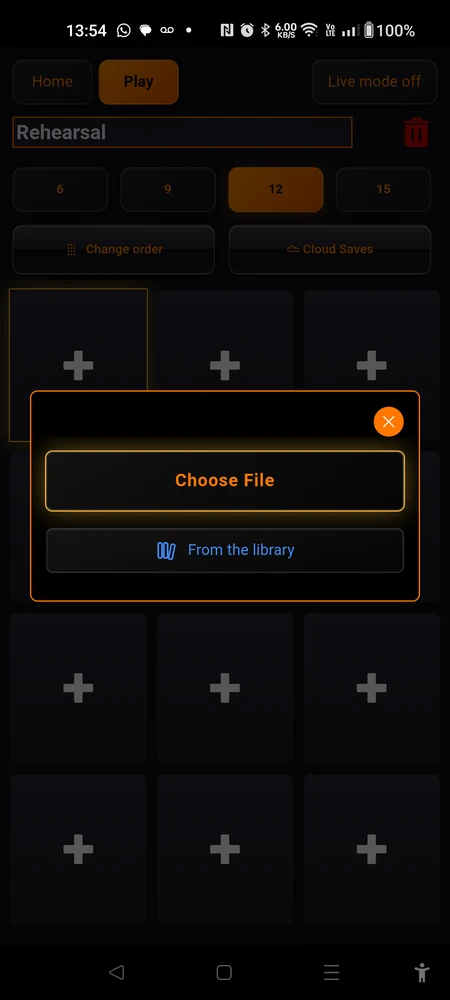
Now the rest of that page is worth thirty seconds:
- The first line of the “File” card is the name on the pad. Make it the name you would shout to the drummer. Short wins, because a long one has to scroll to be read.
- “Type:” offers “Music” and “Sound Fx”. Tap the card to choose. Leave a backing track on “Music”. It means that tapping this pad while another track is playing stops that one and switches to this one, which is what you want between two songs.
- “Volume” shows the level for this pad. Tap it: the slider goes up to 200%, so a quiet export can be brought up to meet the others, and under it a small waveform lets you tap anywhere to jump there and audition with the play button beside it.
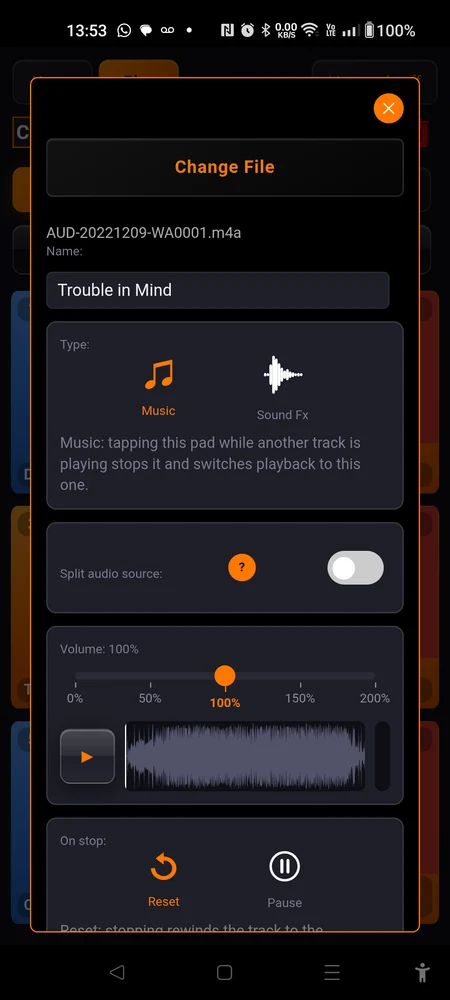
Set the level by ear against your other tracks, not against the room. Matching the pads to each other is the job here. Matching them to the venue is the desk’s job.
Trim the dead air at the front
Most exports start with a fraction of a second of nothing, and on stage that reads as a pad that did not fire.
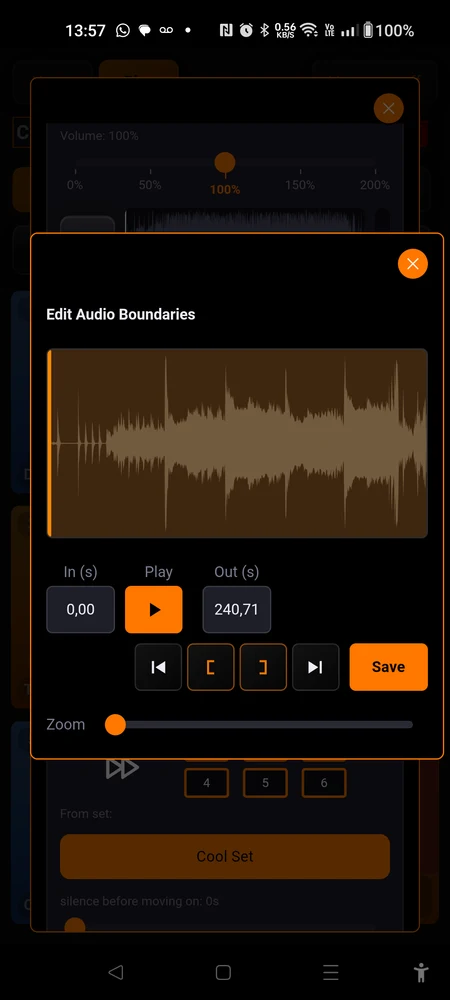
Tap the “Audio Boundaries:” card. The waveform opens in a screen called “Edit Audio Boundaries”. Drag the two handles to where the music actually starts and ends, or type the seconds into “In (s)” and “Out (s)”. “Zoom” gets you close enough to be precise, and the play button auditions the region you have marked.
Tap “Save” when it sounds right. “Reset”, beside the editor’s title, puts the boundaries back to the whole file.
Leave the page
There is no OK button and no Save button in the pad settings, and that is deliberate: every change is already stored the moment you make it. Leave with the back arrow at the top left.
Step 5. The second pad, the fast way
Tap the next pad and do the same thing with your sound effect, with one change: set “Type:” to “Sound Fx”.
That changes what happens when you tap it. A “Sound Fx” pad plays on top of whatever is already running instead of replacing it, and several of them can overlap. It is how you get a phone ringing over a bed of atmosphere, or a crash landing on top of a track that keeps going.
It also gives up what a backing track needs and an effect does not: no count-in, and no lyrics, score or chart on screen. A thunderclap does not need counting in, and its sheet would land on top of the song you are reading.
You have two pads. That is the set.
Step 6. Play it
Tap “Edit mode on” in the header to leave edit mode.
Tap your backing track. The pad turns red while it plays and counts down the time that is left. “Stop all” appears in the header, and it does what it says, to everything, at once.
While something is playing you get a seek bar under the pads with times marked along it. Drag it to move around inside the track. It is there in rehearsal and in preparation, and it disappears in live mode, where nobody needs the temptation.
Now tap the sound effect while the track is still running. It plays over the top, and the backing track carries on. Tap the backing track pad again and it stops.
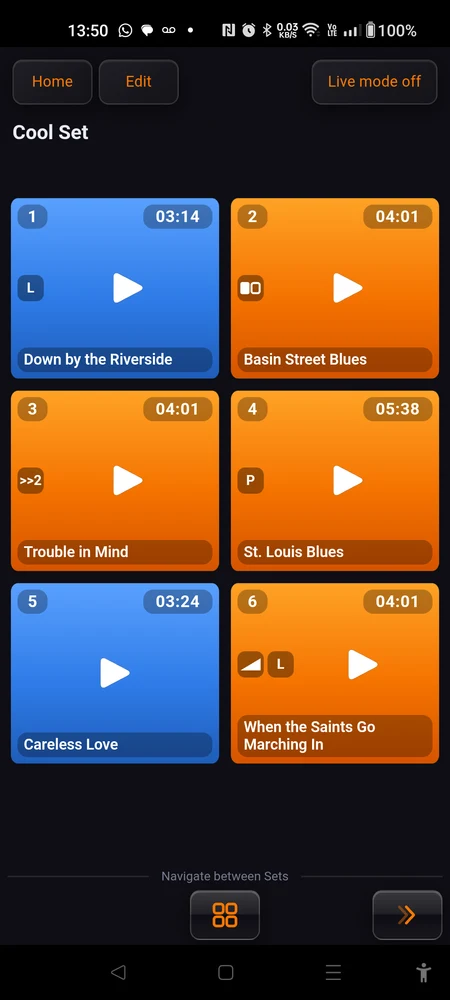
That is the whole gesture the app is built around. Everything else is preparation.
Where to go next
Good habits is the next thing to read, and probably the most useful page here. It is about how people who gig with this every week organise a show: small sets instead of one big one, live mode, and what to check before you trust it in front of an audience.
Preparing a pad is the reference for everything on that settings page you just skated over: count-ins, fades, chaining one song into the next, and putting your lyrics or a chord chart on screen so they follow the track by themselves.