A chord chart is a grid of measures with a chord in each. It is what most bands actually work from, and writing one on paper takes long enough that ideas get away.
The editor in Chord Analyser is built for a phone: everything is a tap, a long press or a drag, and the chord you enter comes out of the same engine as the rest of the app, so it arrives with a real fingering under it.
Getting in
“Chord Charts” on the home screen.
In the free version you land straight in one chart, and it is the same chart every time. In the full version you land in a library.
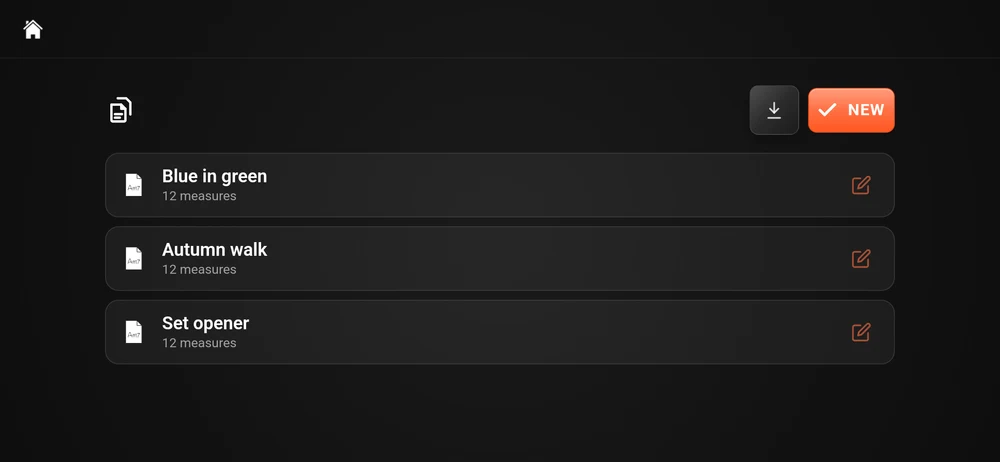
“New” asks for a name, and for how many “Lines” and how many “Measures per line” you want to start from. The button beside it imports a chart somebody sent you.
Tap a chart to open it. The pencil on a row puts it into edit mode, where you get a name field, a duplicate button, a bin, and a handle to drag the list into order.
The editor
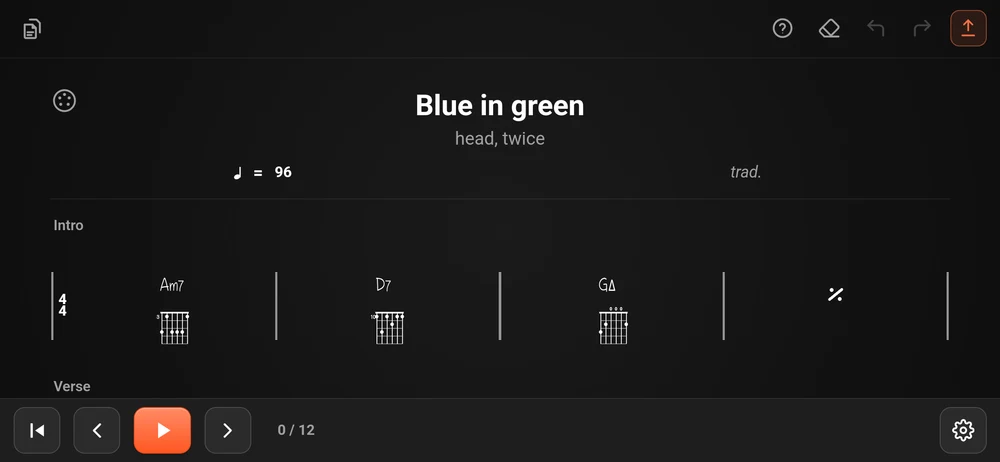
Four regions, top to bottom.
The toolbar, top right. In order: the help button, the eraser, undo, redo, export.
| Button | What it does |
|---|---|
| ”?” | The gesture card. It glows orange while the chart is still empty |
| Eraser | Starts the chart again from empty, after asking. It is undoable |
| Undo, redo | Twenty five steps. Modal edits count as one step each |
| Export | PDF, or the chart as a file |
Top left of the sheet is the MIDI socket, covered in The microphone and MIDI. The button on the far left of the bar takes you back: to the library in the full version, to the home screen in the free one.
The header. Title, subtitle, tempo and composer, all editable in place. Tap the text and type.
The sheet. The chart itself, one line per line of music.
The transport, along the bottom: back to start, previous measure, play and stop, next measure, the position as “0 / 12”, and the gear that opens “Properties”.
Turn the phone
The chart page is the one screen in the app that follows your phone rather than locking itself to landscape. On its side you see one line at a time. Upright you see the lot.
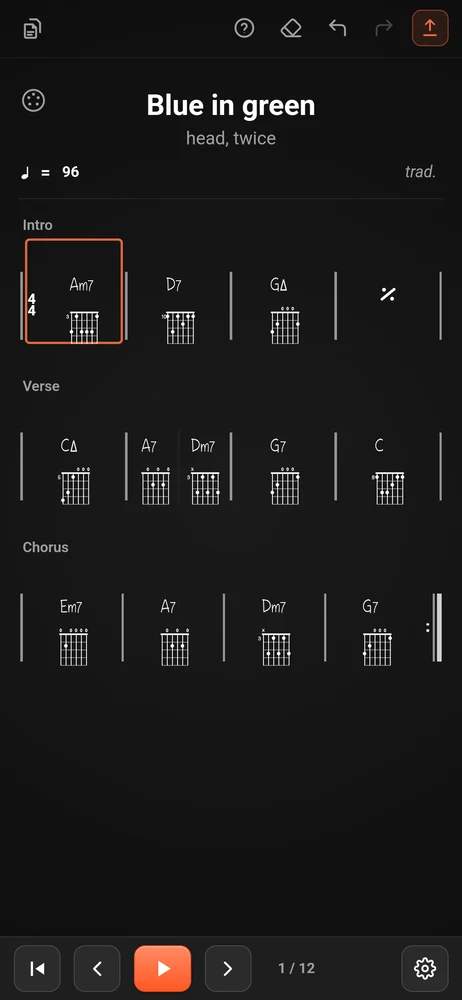
Landscape is better for editing, because the measures are wide and the chord diagrams are big. Upright is better for reading, and for checking that the shape of the song is right. Use both.
The gestures
The ”?” button opens the app’s own summary, and it is the page to look at before anything else.
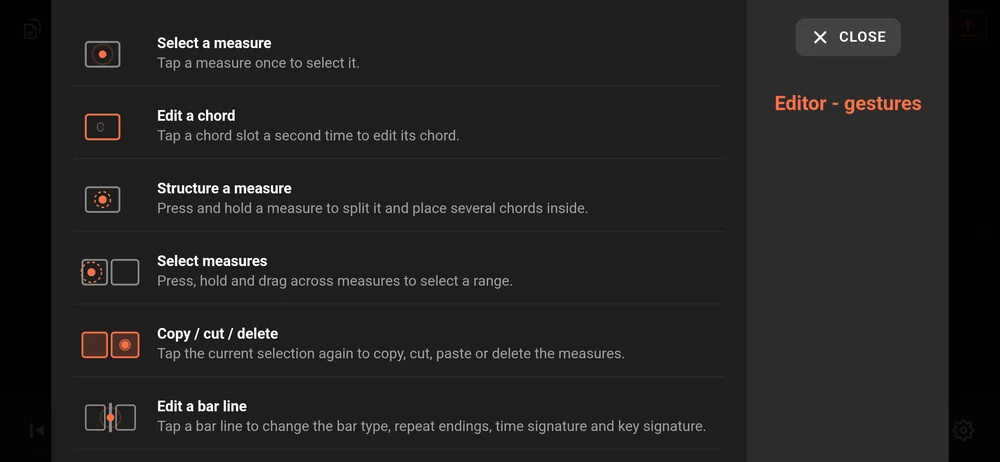
Seven gestures, and they are all you need:
| Gesture | What happens |
|---|---|
| Tap a measure | Selects it |
| Tap a chord slot again | Opens the chord editor for that slot |
| Press and hold a measure | Splits it, so you can put several chords in one bar |
| Press, hold and drag across measures | Selects a range |
| Tap the current selection again | Copy, cut, paste or delete those measures |
| Tap a bar line | Bar type, repeat endings, time signature, key signature |
| Press and hold a bar line | Number of measures on the line, or add measures |
The two-stage tap is deliberate, and it only applies to a slot that already has a chord in it: the first tap moves the play cursor there, and the second opens the editor. An empty slot opens the editor on the first tap, because there is nothing to protect.
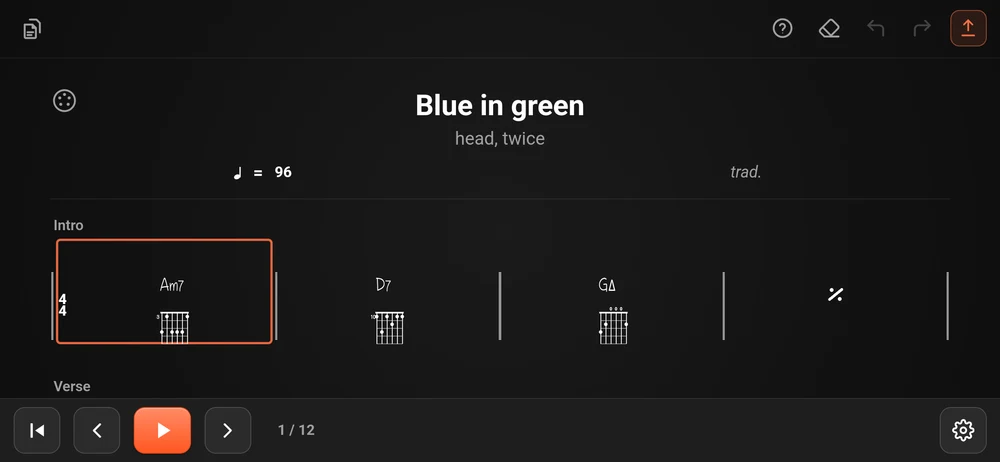
Dragging straight across the sheet scrolls the page, as it should. Selection only starts after a long press, so a scroll never turns into a selection by accident.
Putting a chord in a measure
Tap a slot twice and the chord editor opens on three tabs.
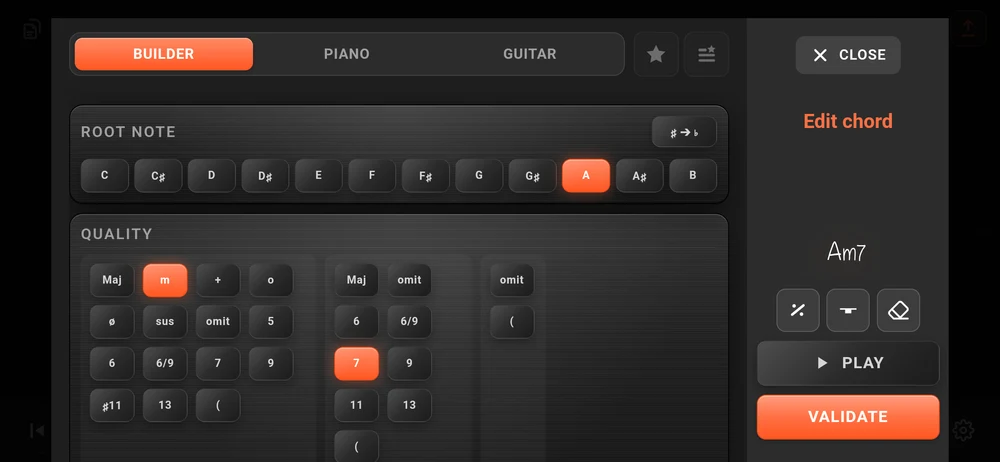
“Builder” is the chord builder from the rest of the app: pick a root, assemble the quality, and the name is drawn as you go. This is the fast way, and the one to use when you know what the chord is called.
Three small buttons down the right handle the things that are not chords:
| Button | Meaning |
|---|---|
| The percent sign | ”Repeat (%)”, the same chord as the measure before |
| The rest | ”Rest”, a bar with nothing in it |
| The eraser | ”Clear”, empty the slot |
“PLAY” sounds the chord before you commit. “VALIDATE” writes it into the chart.
Choosing the voicing
The other two tabs are the instruments, and they exist so the chart carries the fingering you mean rather than the first one the app would have picked.
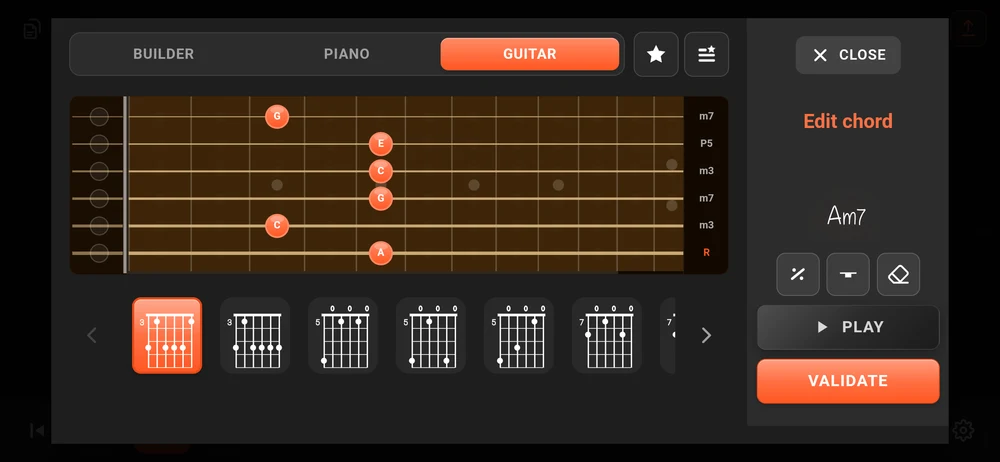
Pick a position on the fretboard tab, or an inversion on the keyboard tab, and that exact voicing is stored with the chord. It is what the tablature under the chord will show, and what playback will sound.
The two icons beside the tabs are the bookmark star and the bookmark list, so a shape you saved elsewhere in the app is one tap away here. They are inactive on the “Builder” tab, because a fingering needs an instrument.
“Auto voicing” is on by default, and it means every chord you pick in the builder arrives with a voicing already chosen: an inversion close to the chord before it, so the chart moves smoothly instead of jumping around the neck. Touching an instrument tab overrides it for that chord.
Shaping the bar
Several chords in one measure
Press and hold a measure.
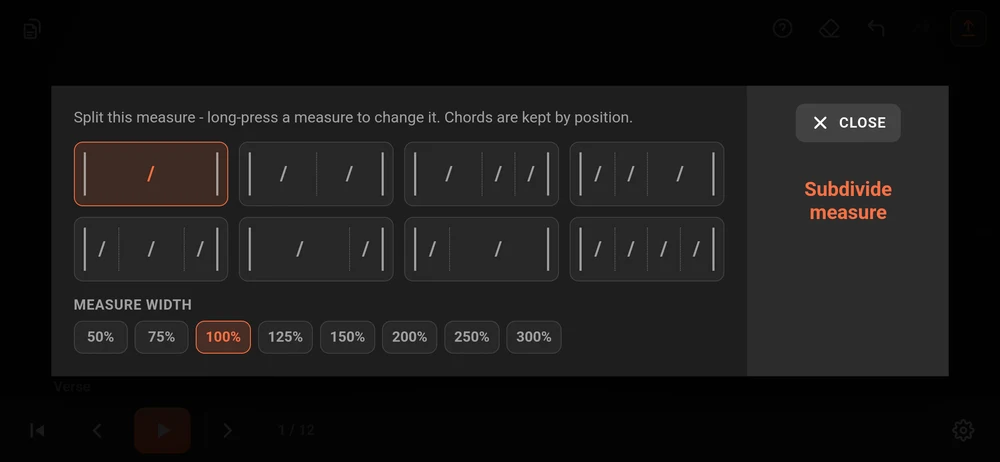
The patterns on offer depend on how many beats the measure has. Pick one and the bar splits; chords you had already entered stay where they were, by position.
“Measure width” underneath is a separate thing and easy to miss. A measure with three or four chords in it needs more room than its neighbours, so you can give it between 50% and 300% of a normal measure’s width. The app already widens a bar when you subdivide it; this is for when its guess is wrong.
Bar lines, repeats, time and key
Tap a bar line.
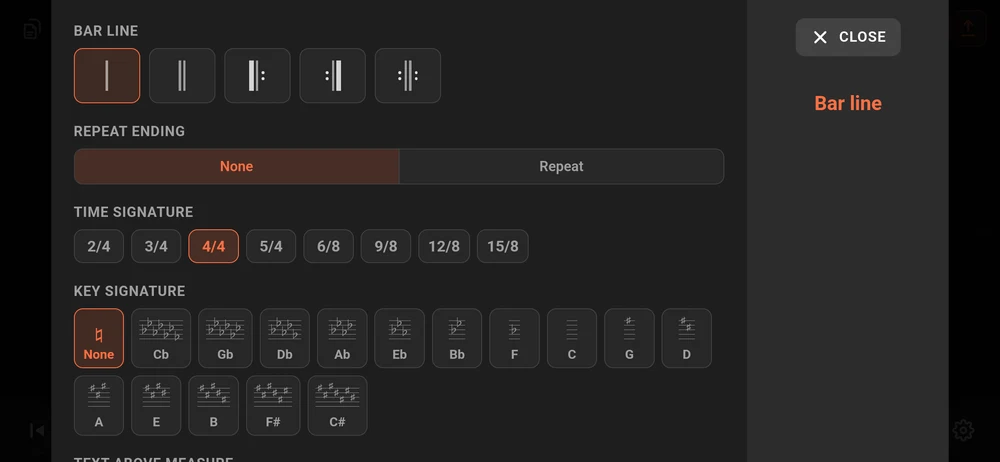
Everything here belongs to one bar line, and a time or key signature applies from the next measure on, which is how printed music works.
- “Bar line”: plain, double, and the three repeat barlines.
- “Repeat ending”: the first and second time brackets. “Repeat” opens a bracket that runs until you close it, and closing it offers you “Last” and “End”. The bracket itself is tappable on the sheet, which reopens this dialog on just that setting.
- “Time signature”: 2/4, 3/4, 4/4, 5/4, 6/8, 9/8, 12/8 and 15/8. Changing it rebuilds the subdivision of the measures that follow, because the number of beats has changed.
- “Key signature”: “None” plus the fifteen keys. This one does not print. It changes how the chords are spelled, so the same chord reads B flat in one key and A sharp in another. It shows as a small grey mark above the measure, in the editor only.
- “Text above measure”: a word over the bar, “Intro”, “Chorus”, “x4”, and where to put it.
The bar line at the end of a line and the one at the start of the next are the same bar line. Editing either edits both, because they are one thing drawn twice.
Adding and removing measures
Press and hold a bar line and you get “Structure” instead: “Insert measures” with “Add before” and “Add after”, “Measures on this line”, and “Line text” for a label over the whole line. A long press below the last line adds measures at the very end.
Measures are not deleted here. Select a range and use the selection dialog, below.
Moving a run of measures
Long press a measure, then drag across the ones you want, and let go. Tap the highlighted range and you get “Selection” with the count and four actions: “Copy”, “Cut”, “Erase” and “Delete”.
“Erase” empties the measures and leaves them in place. “Delete” removes them and closes the gap. Once there is something on the clipboard you also get “Replace” and “Insert after”.
The clipboard survives closing the app, so you can lift a chorus out of one chart and paste it into another tomorrow.
Hearing it
Play, on the transport. The cursor moves through the measures as it goes and stops where you stopped it.
Repeats are played, not just drawn: “Repeat” barlines are followed, and first and second time brackets are taken in the right order. A “Repeat (%)” slot plays the chord before it and a “Rest” stays silent.
Each chord is played with its stored voicing if it has one, and the canonical position if it does not, on whichever instrument the chart names. Playback stops on its own when the app goes into the background.
Properties
The gear on the transport.
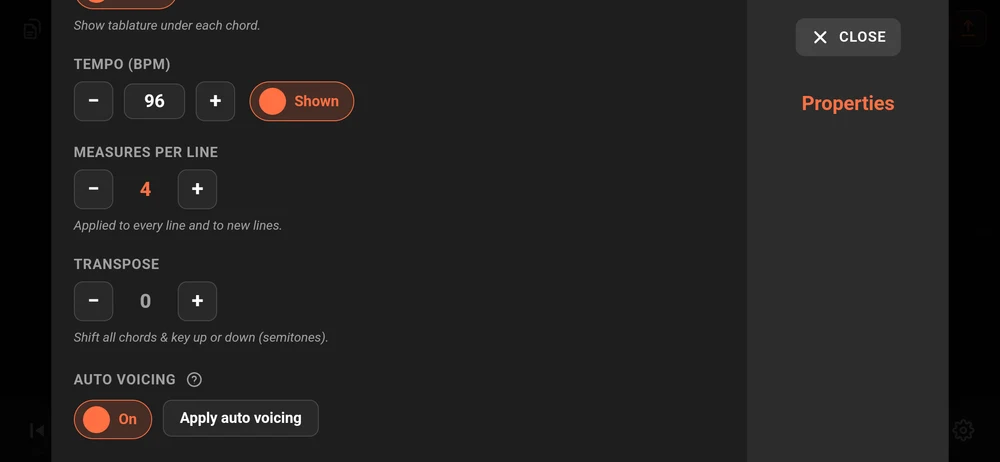
| Setting | What it is for |
|---|---|
| ”Playback instrument” | Piano, or the stringed instrument the chart is written for. The two buttons beside it switch instrument and tuning |
| ”Tablature” | The fingering diagram under each chord. Off for piano, because there is nothing to draw |
| ”Tempo (BPM)“ | The playback speed, and whether the tempo is printed in the header |
| ”Measures per line” | Applied to every line, existing and new |
| ”Transpose” | Semitones up or down, up to eleven either way. Full version |
| ”Auto voicing” | The switch described above, plus “Apply auto voicing” |
“Apply auto voicing” rewrites the voicing of every chord in the chart for one instrument you choose. It is the fix for a chart you entered quickly and now want to play smoothly, and it asks first, because it overwrites anything you set by hand.
“Transpose” is not destructive. The chords, the key signature, the tablature and the playback all shift, and the stored chart does not: set it back to zero and you are exactly where you were. It is the setting to reach for when the singer wants it a tone down twenty minutes before the gig.
Getting the chart out
The export button in the toolbar asks for a file name first, so nothing overwrites anything.
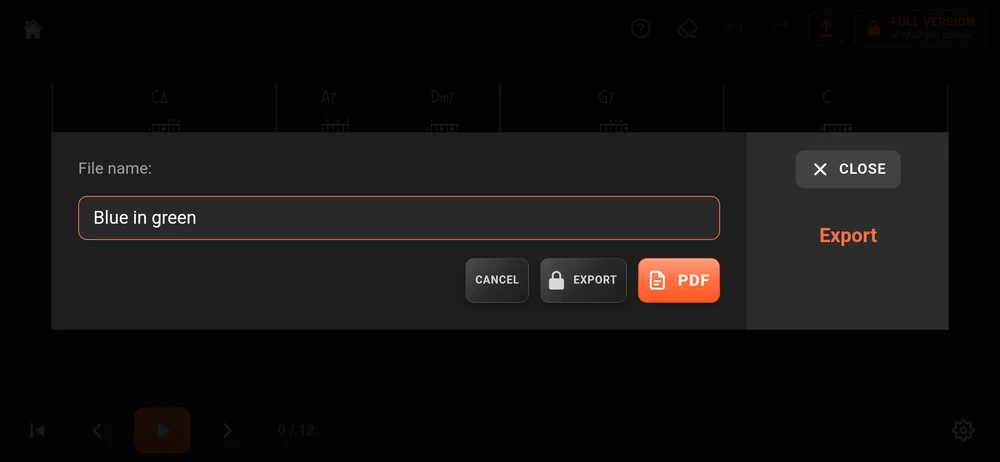
“PDF” is the one you want most of the time, and it is free. The chart is rendered on white with black ink, at a print size rather than a phone size, and then handed to whatever you share files with. Lines are never cut in half across a page break, and the last line is never left alone on a page of its own.
“Export” writes the chart as a .sheet file instead, which is the editable form:
send it to someone else with the app and they can open and change it. That one is part
of the full version, and the import button in the library is the other end of it.
Generating the PDF takes a few seconds on a phone and the app has to stay in front while it happens. The dialog says so.
Where to go next
The free version and the full one: what one chart against many actually means in practice.
Naming a chord you are playing if you are writing down something you worked out by ear and want the name checked first.